Corrugated Metal Tanks installation guide-(ASTM A929/A929M Compliance | AWWA D103-21 Standards)
I. Pre-Installation Preparation
1. Site Assessment
- Verify foundation levelness (≤3mm/m tolerance)
- Confirm tank diameter matches panel curvature radius
- Mark anchor bolt positions per engineering drawings
2. Material Inspection
CheckpointAcceptance CriteriaPanel Flatness≤2mm deviation per 1m lengthCorrosion ProtectionMinimum 200μm galvanized coating (per ASTM A123)Edge DamageNo visible dents >5mm depth within 50mm of edges
3. Tool Preparation
- Essential Tools:
- Magnetic drill (for 12-19mm bolt holes)
- Torque wrench (50-100Nm capacity)
- Laser level (±1mm accuracy)
- Panel lifter (max. 500kg capacity)
II. Installation Procedure
1. Panel Layout Calculation
- Use formula: Panel Length = π × (Tank ID + 2×Panel Thickness) ÷ Number of Panels
- Account for 3-5mm thermal expansion gap between panels
2. Template Fabrication
- Cut 10mm steel plate to exact panel arc length
- Mark vertical stitch lines at 600mm intervals
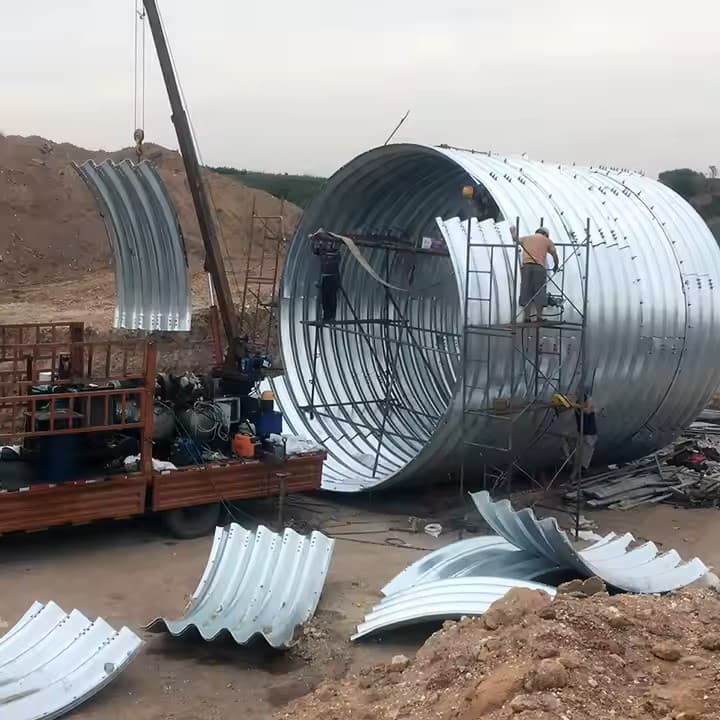
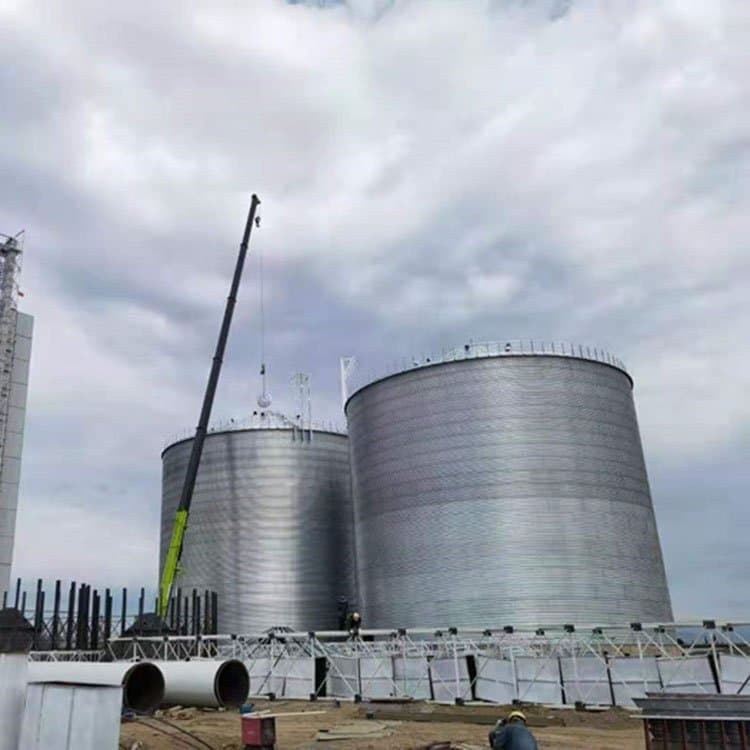
3. Installation Sequence
- Install starter course with 2° outward tilt
- Stagger vertical joints by ≥300mm in adjacent courses
- Use M12 galvanized bolts at 300mm spacing (pre-torqued to 75Nm)
4. Critical Connections
Joint TypeInstallation MethodHorizontal SeamsButyl tape + 25mm lap with 6mm rivets @ 150mm spacingVertical SeamsStructural silicone sealant (20mm bead width)
5. Corrosion Protection
- Apply zinc-rich primer (DFT 75μm) within 4hrs of installation
- Topcoat with polyurethane (DFT 125μm) after 24hrs curing
III. Quality Control Measures
1. Dimensional Tolerances
ParameterAllowable DeviationCumulative Circumference±0.2% of design diameterLocal Waviness≤3mm in any 1m² area
2. Post-Installation Tests
- Helium Leak Test: For tanks holding volatile liquids
- Water Spray Test: 5L/m²/min for 30min to check seams
IV. Safety Protocols
- Use fall arrest systems when working above 1.8m
- Implement hot work permit system for welding operations
- Conduct daily tool box talks focusing on pinch point hazards